Be Kind Handwriting Design: A Designer’s Honest Review for Real Embroidery Use
First Impressions: Warmth, Simplicity, and a Touch of Personality
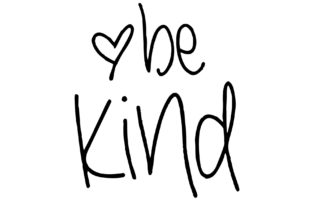
When I first opened the Be Kind Handwriting Design files, I was struck by how approachable and genuine it felt. It's a simple phrase, but the cursive script carries a softness that makes it instantly likable. The design mimics natural handwriting—slightly uneven, organic in flow, and with a gentle rhythm that gives it charm. It doesn’t scream for attention, but rather invites a closer look, which is perfect for projects that aim to feel personal, handmade, or emotionally resonant.
This design fits right into the current trend of minimalist, heartfelt expressions in craft and apparel. It has a gentle, almost nostalgic quality that could easily translate to a variety of products—from teacher appreciation gifts to boutique-style tote bags or even personalized baby items.
Real-World Application: How It Works in Actual Embroidery Projects
I tested the Be Kind Handwriting Design on a few different fabric types and project formats to see how it held up under real conditions. Here's what I found:
- Tote Bags: The script scaled well on a medium-sized tote. It looked clean and legible without appearing too dense. The spacing between letters allowed the fabric texture to peek through just enough to add depth.
- Sweatshirts: On a thick fleece-backed fabric, the design stitched cleanly but I noticed the thinner strokes in the letters could get lost a bit in the nap. A test stitch on a similar scrap beforehand helped me adjust the placement and thread color.
- Baby Onesies: When resized for a smaller application, the design held up nicely. However, I’d recommend using it on a short line or as a single word rather than the full phrase to maintain clarity on tiny garments.
- Embroidered Patches: This design works beautifully as a patch. The clean outlines and moderate detail make it easy to stitch out and finish professionally, even for small batch production.
Where to Use It Carefully
While Be Kind Handwriting Design is versatile, it does have some limitations that crafters and small business owners should consider before jumping into production:
- Small Hoop Sizes: The full phrase may not fit comfortably in smaller hoops without significant resizing, which can compromise legibility.
- Textured or Stretchy Fabrics: The fine lines in the script can sink into textured materials or distort slightly on stretchy knits. Stabilizer choice becomes more critical here.
- Dark Fabrics: Thread color contrast is key. I found that a bright white or soft pastel thread worked best on dark backgrounds to maintain the design’s readability and warmth.
- Curved Surfaces (like caps): Letter distortion can happen if not hooped properly. It’s better suited for flat areas or with minor adjustments for curved applications.
- High-Wear Items: Since it’s a lighter stitch count (based on visual inspection), frequent washing may affect its crispness over time, especially on thin or delicate fabrics.
How It Impacts the Final Product
From a design perspective, the Be Kind Handwriting Design adds emotional value to any finished item. It subtly communicates care, positivity, and authenticity—qualities that resonate well with customers seeking meaningful handmade gifts or boutique-style apparel.
For Etsy sellers and craft entrepreneurs, this design helps elevate the perceived value of a product without overwhelming the overall look. It’s not overly decorative, which makes it ideal for a wide audience. Whether used on a holiday gift tag, a personalized tea towel, or a custom apron, it enhances the product’s handmade appeal while maintaining a clean, professional finish.
Designer Notes: What to Check Before You Stitch
Before diving into your next project with this design, here are a few practical tips I’ve picked up through testing:
- Test on Scrap Fabric: Always run a test stitch-out on a similar material to your final product. This helps catch any density or clarity issues early.
- Check Thread Color Contrast: Don’t assume your default thread palette will work. Try a few options on both light and dark backgrounds.
- Review Stitch Density: Lighter stitch areas may need a second pass or slight density adjustment to prevent fading over time.
- Confirm Hoop Size: Make sure the design fits comfortably within your machine’s hoop. Resizing too much can affect the integrity of the lettering.
- Inspect Small Details: The thinner strokes in the handwriting style can sometimes break or pull on certain fabrics. A close visual check after stitching is essential.
- Mockup Testing: Try placing the design in black and white mockups to see how it looks in different contexts—this is especially helpful for digital product sellers.
- Use Proper Stabilizer: A medium-weight tear-away or wash-away stabilizer works best, especially for stretchy or textured fabrics.
- Check Licensing: Since this design is part of the Teacher Shirt collection, confirm whether it’s cleared for commercial use or resale of finished items before listing it in your shop.
Final Thoughts: A Thoughtful Design for Meaningful Projects
The Be Kind Handwriting Design isn’t flashy or intricate, but that’s exactly what makes it valuable. It’s a quiet, heartfelt design that works well across a wide range of embroidery applications. Whether you’re creating a custom gift, a small batch of boutique apparel, or digital design assets for other makers, this design has the versatility and emotional resonance to make your project stand out in a thoughtful way.
As a designer, I appreciate how it balances simplicity with character. It’s not just a design you stitch—it’s one that tells a story, and that’s what customers are truly buying.